Collaboration Tools I reviewed Google Drawing, Google News, and Google Scholar. I also reviewed Thinglink, Padlet, Pixlr and Popplet. Google Drawing News and Google Scholar are great tools for researching information. Students can use these resources to gather information for a report or presentation. For an assignment a student can select or be assigned a Georgia Standard of Excellence such as; "SS7E3 Describe factors that influence economic growth and examine their presence or absence in Nigeria, South Africa, and Kenya. a. Evaluate how literacy rates affect the standard of living." The student could use Google News or Google Scholar to find our more information on the literacy rate and standard of living in Nigeria. Google Scholar also has a year range filter, which is helpful in finding more recent research on a specific topic. However, Google News is much more K-12 friendly. The abstracts and articles on Google Scholar require a higher skill level to comprehend. Students can use articles from these sites and post them with images on a Google Drawing. Students can be assigned a region of the world and a standard to research. They can synchronously collaborate and create a Google Drawing with their peers and include images with links to their articles. Students can then share the Google Drawing with their class or anyone for viewing. Thinglink is a useful tool that is similar to Google Drawing. On Thinglink images can be linked to websites. However in Thinglink, one image serves as the background, then several links can be added on top of the background image. This is great tool for Social Studies, because a map can be used as the background and several links can be added in different regions. Thinglink even has 360-degree virtual images as a built-in resource, but an upgrade is needed to link this feature to a Thinglink creation. I did not view this resource for use primarily a collaborative tool for students using the free version. However, the students can send their image and links to the teacher and the teacher can add the links to the background image and then share it with others. The final Thinglink would be a resource created by collaboration. The site also requires logins and fees for use with classes which can be problematic for some schools. I would suggest Google Drawings for a Google-based schools as a more cost-friendly option. Padlet has a variety of viewable formats and I chose the chat bubble option. Students can research articles or information and post text, images and videos to the page. I think this a great feature for students to collaborate and share their learning. A login is also needed for this program, but logins are helpful for identifying which student is posting specific information. Pixlr is great for teachers who want to have their students complete assignments on devices instead of paper. A teacher or student can upload an image to the site and edit the image. The image uploaded can be a diagram or a map or anything and a student can draw or type on the image. An example of how this could be used collaboratively students could be in a group and each student could be assigned to add and label a specific type of landform to the map. Students can send the image to each other and add all the landforms until the map is completed. The final map can be used by the students as a resource. Even EL students and students with disabilities would be able to complete this assignment with little to no help in a collaborative group. This site did not require login for the simple editing for this type of assignment. Popplet is another great resource for collaboration. Popplet is similar to Padlet because multiple students can add information and images to the Popplet and a login is required. It differs because students can literally draw connections on the Popplet. They can connect similar ideas or pieces of information with another one to create visual connections. As we read in 20 Collaborative Learning Tips and Strategies For Teachers, “Collaborative learning teams are said to attain higher level thinking and preserve information for longer times than students working individually”. With this knowledge and the availability of programs for collaborative student engagement, teacher can help students learn more productively. The above image links to my examples of the Collaboration Tools I referenced. BYOD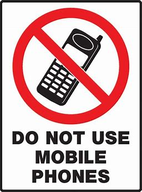 As a virtual school, we always use BYOD. Students use their devices to access the curriculum, attend synchronous sessions, and complete assignments. Sometimes students use two devices when we play Kahoot. They can hear me via their computer or laptop and they play the game with their cell phone. In my synchronous sessions, I begin with providing students with class norms. They know that they are to be respectful with their words, stay on topic, and not spam the chat. When I meet with students in person, I gain their attention by keeping my activities interesting and by using proximity to encourage on task behavior with student devices. I also use a strategy that my principal uses in faculty meetings, I ask students to remove their hands from devices, “Be hands free,” while I am giving instructions or when I need their undivided attention. This is a helpful strategy with adults and students. Honestly, when my students have any type of technical issue my go to phrase is “Call tech support.” However, I have learned some frequently successful trouble shooting strategies. When a web-based program does not open for a student, I suggest that they use a different browser. I would also encourage that any teacher incorporating BYOD, try their lessons out first with another device and ask his or her peers to try out the program or website on various devices. While using my smart phone while participating in a Nearpod activity recently, I learned that cell phones are not compatible for one of the short answer activities. I could not type any information to submit my response. Using my cell phone also slowed my response-time while completing a timed matching activity. Teachers should take the information they learn in their practice session into consideration before they allow students use a variety of devices for BYOD assignment. Just a few years ago, there were signs in school classrooms that indicated no cell phone use permitted in class. Just like the antiquated mobile phone in the image above, the norm of no cell phone use in school is becoming outdated. The more teachers learn how to incorporate cell phones and mobile devices in their classroom, the more student engagement can increase and the image below will become the new normal.  References
https://www.georgiastandards.org/Georgia-Standards/Documents/Social-Studies-7th-Grade- Georgia-Standards.pdf https://www.teachthought.com/pedagogy/20-collaborative-learning-tips-and-strategies/
1 Comment
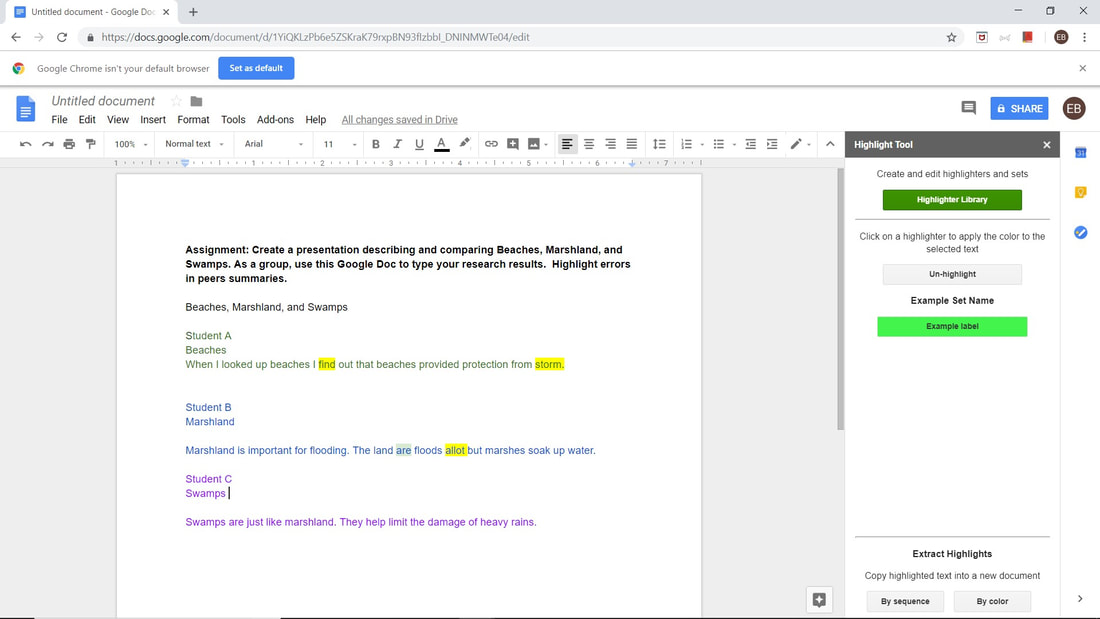
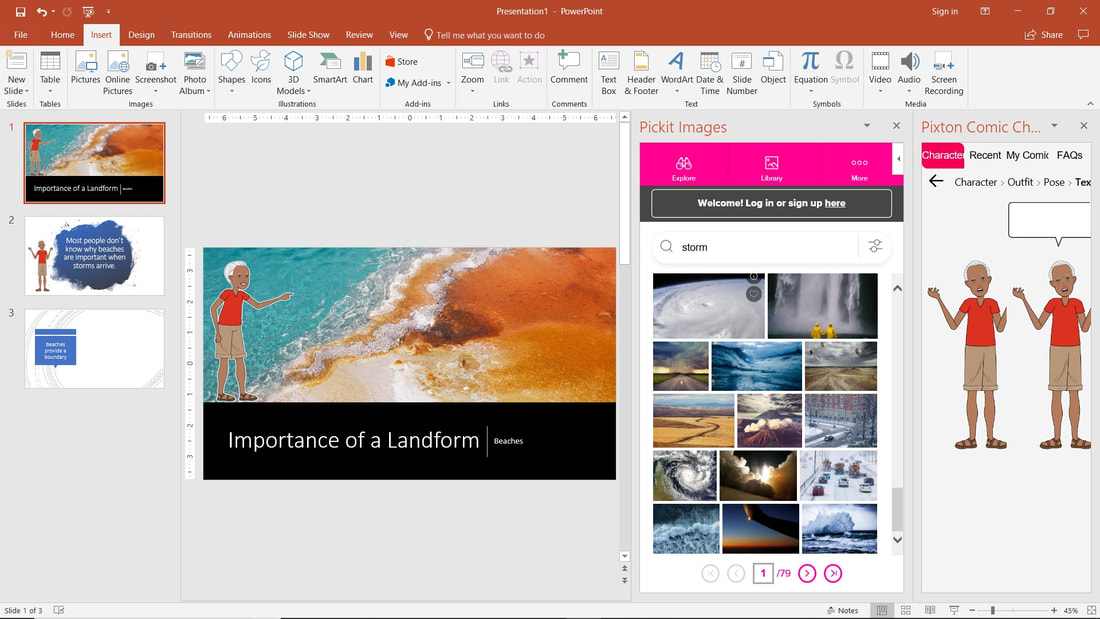
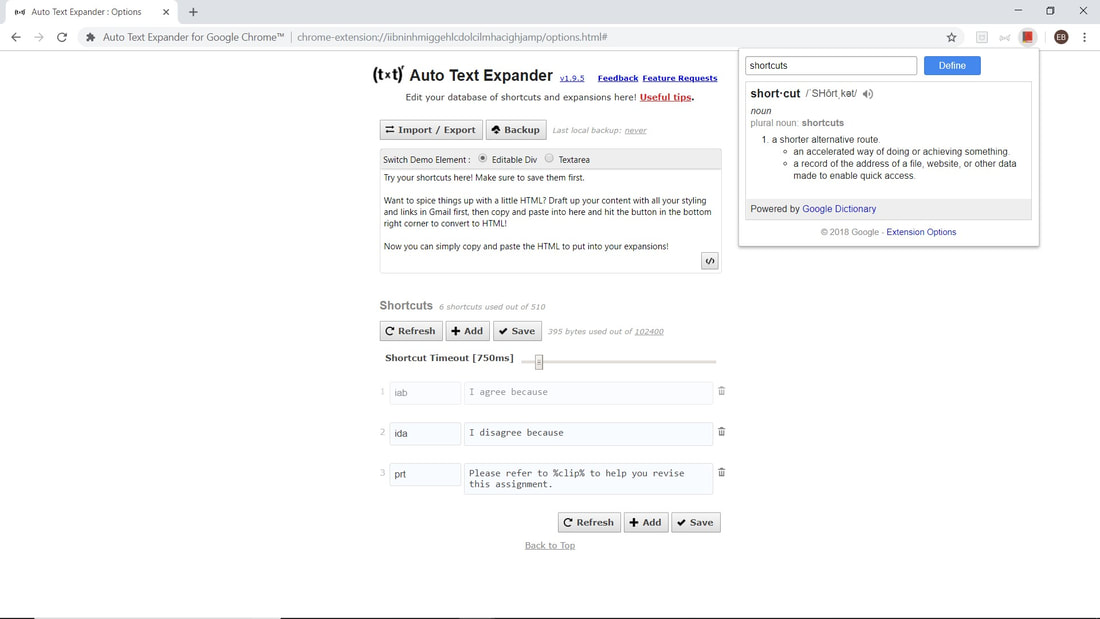
Spark Video This Spark Video, African Selected Features, was created to introduce/reintroduce 7th grade Social Studies students to the select features in Africa which connects with one of the 7th grade Social Studies standards. I want students to learn about the geography of various regions in Africa. The experience showed students where named landforms were located geographically and what the landforms looked like. When I was a student I learned about various landforms. I was not often provided with the opportunity to see what the landforms really looked like while in class. This provides students with an opportunity to connect and experience what a landform on a map actually is and how the people who live near the land form interact with it. Each of the images selected, shows the landforms with structures, animals, machines, or people. This helps students make connections and understand the context of the imagery. The Spark Video on select features of Africa can be used to introduce students to the geography of the region. It can also be used, as instructed at the end of the video, as a springboard for students to begin or extend their own research on the region for a project. After researching, the students can post or present their mini-projects to their peers. To help students with the mini-project, I will provide the students with resources. I will also explain to students the importance and purpose in documenting where information is retrieved. This process will also help students differentiate between open source or Creative Commons information and copyrighted materials. Extensions and Add-Ons I selected text expander and google dictionary as Chrome extensions. Text expander is helpful for students when responding to peers in discussions. Students who struggle with typing can use text extenders for frequently used statements. As a teacher, I can use text expander when communicating similar responses to numerous student assignments. I can also use it to redirect student learning by quickly referring students to a resource for remediation or extension. Students who have memory issues and/or struggle with the meaning of certain words can use the google dictionary extension. I selected Pickit, Pixton Comic Characters, and Highlight Tool. As a teacher, I can use Pick-it for presentations for visual learners to capture their attention. Students can use Pickit to help them express themselves creatively in projects and presentations. Teachers can help students with processing skills by using Pixton Comic Characters to help explain the purpose and context of specific content. Students can also use Pixton Comic Characters to aid them with their creativity and expression. Some students are better able to communicate their ideas with pictures and expressions than they are with words and Pixton Comic Characters can help them do this. The highlight tool can be used by teachers to indicate where students have errors in documents. Students can also use the highlight tool to help each other make corrections in their collaborative group assignment prior to submitting their final drafts. |
E. DrakeVirtual School Educator, ITEC Ed.S. Candidate Archives
May 2019
Categories |
 RSS Feed
